Although Weather Vane sometimes referred to as a” Weathercock” performs some functions they have become more of a collectible form of art. From the earliest part of its history, they have depicted birds ships, and horses. Still, for centuries performed an important job for the Landowners, Shippers, and Astrometers who used them for centuries. What does a Weather vane Do?
A weather vane, wind vane, or weathercock is an instrument used as far back as Ancient Greece for showing the direction of the wind to help predict the weather, for farmers, fishermen, and ships. Now mostly used as an architectural ornament on buildings. Partly functional, but are generally decorative.
Weather Vanes have been used from Ancient Greece to the Vatican in Rome to Westminster Abbey but despite their forgotten use in the world they continue to be reinvented as a valuable art form.
Who Invented the Wind Vane
For many years Weather Vanes called Wind Vanes were the early technology of the day simply for showing the direction the wind was coming from. Wind Vanes could not only show the wind direction but the velocity too. this made the simple device an important tool for people involved with shipping agriculture and travel.
Since then with the oncoming of technology naturally, they have taken a back seat now taking their place in historical artifacts that have been of great interest worldwide. The first Weather Vanes were talked about in ancient history. Greek astronomer Andronicus created the first recorded Weather Vane around 48 B.C. It sat atop the Tower of the Winds in Athens and was designed as a tribute to Triton.
That Vane was made of bronze and was a shape of a man with the tail of a fish. The wealthy Greeks and Roman show status by adorning beautiful Weather Vanes usually built to image the Gods of the day.
Starting in the ninth century, Scandinavians began to use wind vanes on ships and church roofs steeples. Scandinavian units were shaped like a quarter-circle and rotated around a vertical axis. They were often attached to the front of Viking ships, and many were adorned with the standard rooster, animals, or other designs.
Around the same time, the head of the Catholic Church decreed that all European churches should be adorned with a rooster-shaped wind vane. This was done to remind the followers of the betrayal of Jesus by St. Peter before Christ was crucified.
In the Middle Ages, Weather Vanes were used throughout the cities. Archers from the armies used Vanes the word vane comes from “fane,” a term that means “flag.” was used to judge wind direction and wind speed that would help in battles.
The Archers were used as models depicted on Weather Vanes for many years since. The first manufacturer of weather vanes and wind vanes in North America was Shem Drowne, who made weather vanes during the early 1700s. George Washington had a Dove of Peace Weather Vane commissioned from his company and set atop his home after the Revolutionary War.
Traditional Weather Vane
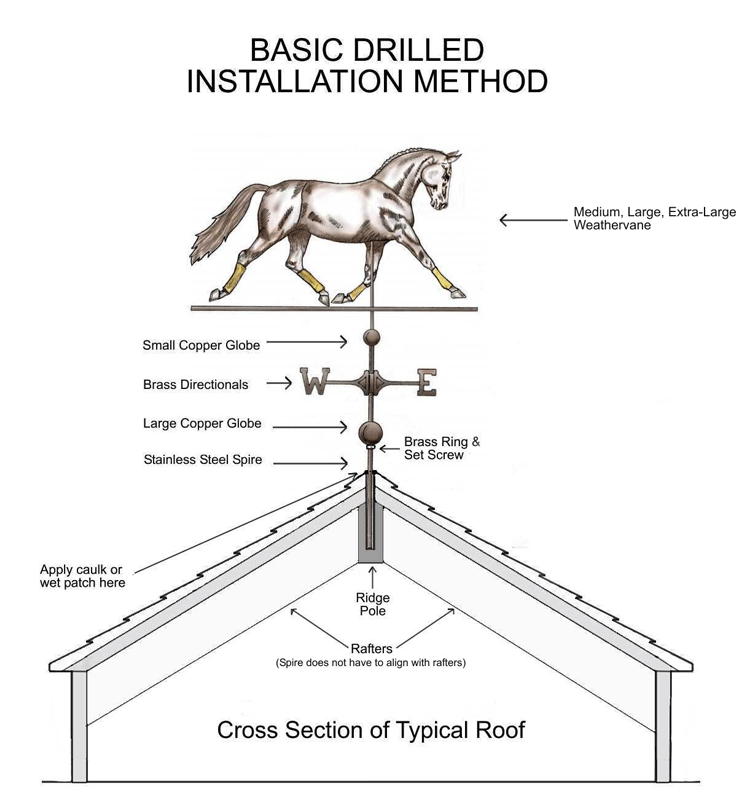
Most weather vanes consist of: A Rotating Ornament that points the direction at the top of a rod. The weather vane usually includes a brass rod approximately 28 inches long, a small globe at the top of the fixed portion of the rod, and a larger globe at the bottom of the rod. A directional that indicates north, south, east, or west is usually affixed to the rod between the two globes. The assembly portion is made up of the post the compost points and globes don’t turn. 
- The figurine/arrow is the part that turns. (Horse)
- Most Weathervanes turn and point or face the oncoming wind.
- They are designed so that the greatest amount of mass is to one side of the spindle.
- This causes resistance for the wind and it pushes that part away until the slim front edge of the vane is facing into the wind.
- If a Weathervane is pointing towards the ‘N’, the wind is coming out of the North, and therefore a Northerly wind and its corresponding weather
Weather Vane Construction
A traditional weather vane will have a brass rod approximately that is 28 inches long, 1 large and 1 small copper globe, a brass collar with set screws, a directional with set screws, a spinning ornament, and a stainless steel inner rod and ball bearing. The ornament is affixed to the stainless steel rod, that sits inside of the brass rod, so it’s able to spin.
The Directional should not spin but point towards the north. Use your screwdriver to tighten the set screws and assemble the entire Weathervane down below before climbing up on the roof. Some Weathervanes use a flange and retaining clip. For this example, we’ll use a drilled hole and fit the rod directly into the beam. If you have Rod extensions make sure you don’t strip the threads and you tighten the Rod together before attaching it to the roof.
- Slide the Brass Ring down the Rod first and tighten the set screws but don’t overtighten
- Slide the larger Globe down the Pole and rest it on the Brass Ring
- Slide the (Interlocked) Directional down the Rod and rest them on the Large Globe
- Slide the Smaller Globe down the Pole and rest it on the Directionals
- Make sure the Directional is pointing North.
- Slide the Figurine/Arrow down the Pole and rest it on the Small Globe
- Seal up around the exposed area and all around the Weathervane on the roof
How to Install a Weather Vane on a Roof
- Locate the Ridgepole on your roof that runs horizontally the length of your roof’s ridge-You need to mount the brass rod into the beam. Make sure the diameter of the drill bit is the same or slightly smaller than the brass rod so that it fits into the beam nicely snug.
- Insert 8-9 inches out of the 28-inch pole into the Ridge Pole Beam. (See the diagram on the top-left)
- Once the hole has been drilled then slide the Weather vane into it.
- Check to see that the brass rod is completely down into the Ridgepole
- Check that the larger Globe is resting on the Brass Ring and that the set screws on the Ring are tight but not over tight.
- Get it right the first time, unless you like climbing the roof. I don’t
https://mywaterearth.com/how-to-bleed-your-home-radiators/
How To Read a Weather Vane
A lot of people get confused about how the proper way to read the Weathervane once it’s assembled and attached to your roof. The best way of answering this and how it works is to put it into a question and answer it. The question is this: If the wind is coming out of the West and blowing straight to the East, is a weather vane designed to have the Figurine/Arrow pointing to the East, indicating the wind is moving to the East? Or does it point to the West, indicating from where the direction of the wind is coming from? not going to?
The Answer:
The arrow points in the same direction that the wind is blowing. If the wind is coming from the West, the arrow points to the West. The arrow on the weather vane always points in the direction that the wind is coming from. So, if the wind is coming out of the west, the arrow on the vane points to the West.
The same is true for all wind direction sensing instruments.
David R. Cook
Atmospheric Research Section
Environmental Research Division
Argonne National Laboratory
Most weather vanes are designed to point in the direction the wind is coming FROM.
So if the weather vane is pointing East (and there is a wind blowing), it is an East wind. (Recall that wind direction is also reported as the direction FROM which the wind is coming. In the continental U.S., the “prevailing westerlies” move from the pacific coast to the Atlantic coast, from west to east.)
Richard E. Barrans Jr., Ph.D.
PG Research Foundation, Darien, Illinois
Wind direction changes often accompany changes in the weather farmers and fishermen often used the Weather vane for predictions of weather patterns and upcoming storms. Exactly what type of weather the wind brings depends a lot on what type of environment (ocean, desert, mountains, plains, etc.) exists in every direction near your location.
- Wind from the south often means warmer, moister air is approaching.
- Wind from the north often means cooler, dryer air is approaching.
- When the wind changes abruptly it could be a passing front or signal an approaching storm.
How Does a Weather Vane Work
First for the Weather vane to work it must be placed high enough so that buildings or any structures can’t interfere with the wind that’s operating it. That is why they are positioned at the highest points on buildings on properties where observers can make a positive determination on the direction of the wind but the wind won’t be obstructed.
When building a weather vane the design must be planned to:
- allow for spinning freely on the vertical axis.
- The surface area of the design must be asymmetrical, and unequal, which enables the smaller area to turn into the wind.
- However, the weight must be equally distributed on both sides of the axis of rotation to allow the wind vane to spin freely.
- The small endpoints in the direction from which the wind is coming, and the larger endpoints where the wind is going.
- The individual installing the wind vane would need to align the directional markers with the geographic directions of north, south, east and west.
- The directional markers allow observers to identify the wind direction easily.
How Are Weather Vanes are Made
Handcrafted Weathervanes are an art form that is rarely found but is still sometimes used. The subject matter for the Weather vane depends on who is using it and where. The standard rooster can be replaced with any animal, message, or symbol like this The Kings Bay Sailfish Bill Fish Copper Weather Vane Vintage Old Style Shore Beach
There are materials and designs that are specific to the customer’s needs and desires and then the craftsmen start the detailed skilled work that involves lots of hours that are put together to make these art forms come to life and are added to the population that makes these very unique to homeowners around the world.
Like most people, I was kind of surprised to learn about this artist and growing interest in the art form.
For one company called West Weathervanes, the process works somewhat the same way it 2000 years ago except during the soldering process where today the process uses electricity while back in the day the Greeks would use a bellow and forge to solder the pieces together. Today here at this company it works something like this:
- Once the basic concept has been discussed and a preliminary quote for the new weathervane has been prepared for approval, a deposit of one-third of the quoted price for the weathervane is requested. Upon receipt of the deposit, we will reserve time in both our Design Schedule and our Production Schedule for the new vane.
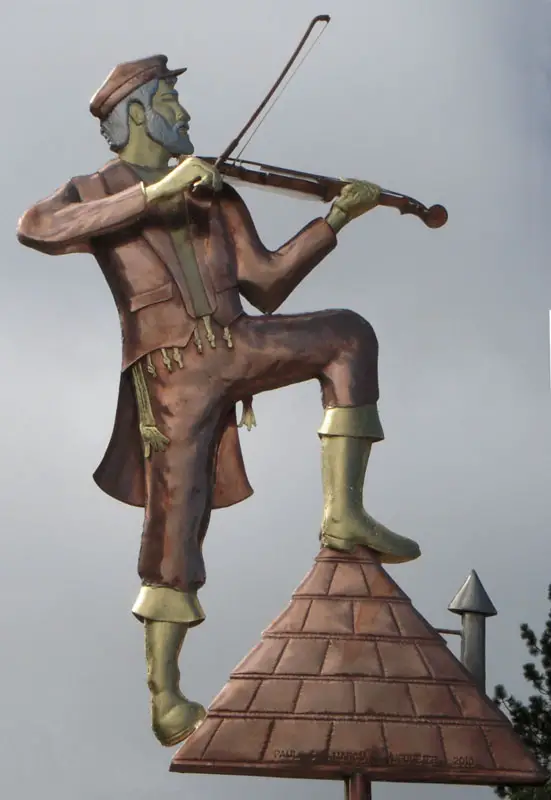
- An illustration will then be prepared for approval. Below are several examples showing you the preliminary drawing and the finished weathervane.
- A template is used from the illustration
- The template is used to make individual pattern pieces needed to cut out the weathervane. The Template is a large life-sized appropriate template.
- The next step is to cut out the copper, brass, or nickel silver sheet.
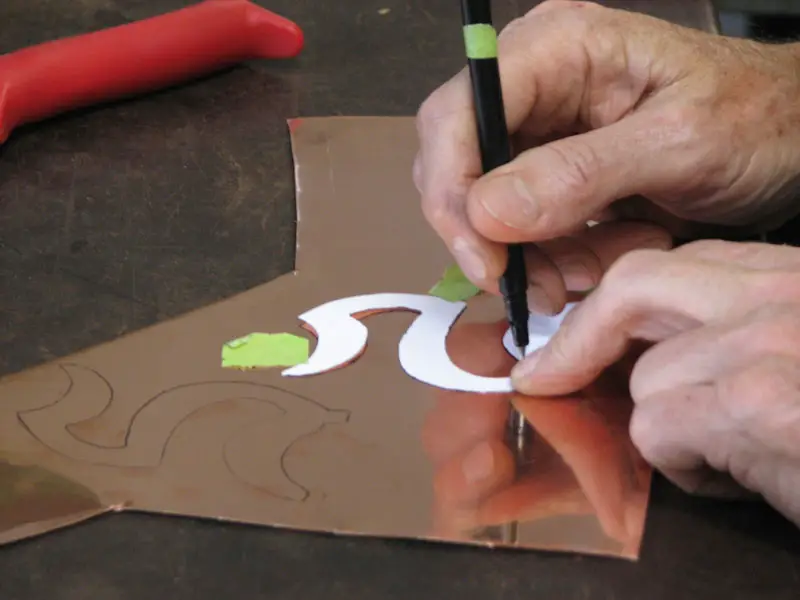
- To trace the paper pattern onto the sheet metal.
- After that, we begin the cutting process.
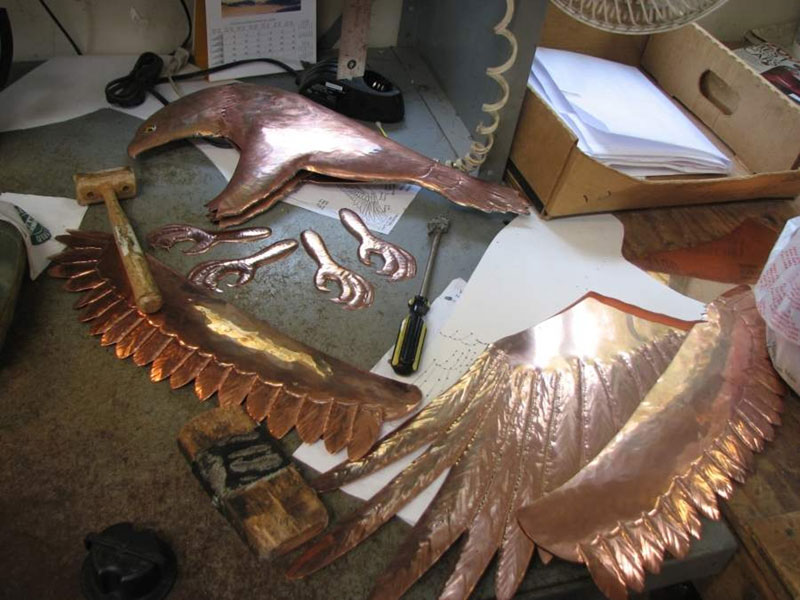
- Texturing a weathervane takes time, a good eye, and a steady hand. Using customized metal hammers to add texture. This technique is called repoussé.
- Shaping the Weather Vane. The shaping process is where the true artistry in weathervane making takes place. This is the most difficult technical skill to master and can truly only be accomplished with years of practice.
- Soldering the weathervane-Using copper, brass, and nickel silver
- Leafing the weathervane– which is specific to this company leafing gold with copper
As you can see the Weather vane has made a long journey throughout history to find itself in a unique situation. Born as a simple tool and now thousands of years later re-born as a beautiful art form that continues to find itself showing the direction of the wind as it did in the past.
References:
Sciencing The History of Wind Vanes-Article by – How Does a Weathervane Work by- November 22, 2019 By Julia Fuller


