The summer can bring some great food from the ocean that adds to vacation time like clams. The best way to enjoy them is to clean them properly. Clams will clean themselves out if you know how to soak clams to get rid of sand and grit the proper way. How do you get Clams to spit out sand?
The best way to get clams to spit out Sand is to:
Mix 1/3-cup salt (100 grams) with 1 gallon (3.8 liters) of cold water in a bowl.
Add approx.3 tablespoons of Corn Meal
Add clams, cover
Let them soak in a cool dark spot in the house for at least 2 hours
The more clams the longer
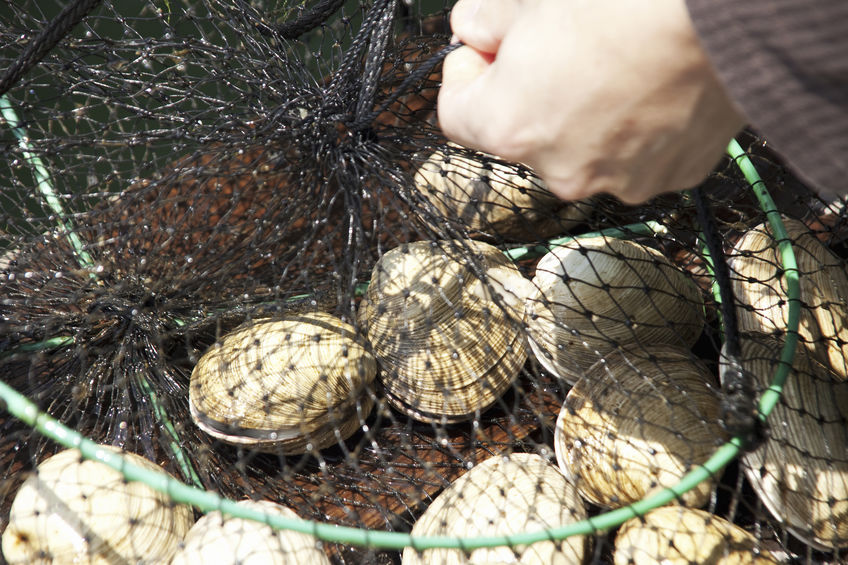
Rinse, drain and cook
Learn to separate good clams from bad clams by sight and smells right away so you don’t contaminate all the clams by not throwing out the ones that may have toxins in it. Then learn how to soak clams to get rid of sand. Store and prepare them safely until you are ready to cook.
Bad Clams
- Throw away any clams that have cracks in their shell or are broken. It is an indication that the Clam is most likely dead.
- If a Clam is easy to open when you buy or catch it then it’s typically dead.
- You can tap an open clam with a shucking knife that is a 3″ strong and sturdy rounded tip knife, or use a heavy spoon. The open clam should close by itself. If it doesn’t throw it away.
- Add the clams to a bowl of water and fresh clams will sink dead Clams will float. If a clam is dead from toxins found in the water where it came from they can be transferred from one clam to another to get rid of them even if you’re not sure.
- If you bought a bunch of clams you never want to cook dead clams with other healthy ones. They’re dead for a reason and you can guarantee it ain’t good. Once they die, toxins build up in their tiny bodies, which they’ll pass to you, no matter how much you cook them.
- Inspect your catch right after you buy the bunch and again before you cook them and toss anything dead. If you’re throwing out more than a couple, be wary then be wary of the whole bunch.
- As with all fish and shellfish, your bivalves should have a like smell with no hint of fishiness or ammonia.
How Long Can You Keep Clams in the Refrigerator
Now that you are certain that the clams are alive store them until you’re ready to cook them. The best way is to keep them in an open-type mess bag like the ones that are used in the supermarket where clams or oysters are sold. Never store them in a plastic bag or container because they will suffocate and be dead by the time the barbecue starts.
James Peterson, author of Fish & Shellfish: The Cook’s Indispensable Companion recommends placing ice over the towel, and most experts recommend that you don’t store them for more than two days. Don’t ice your bivalves directly, as their hard shells belie a delicate flesh. “They die between 35 and 40 degrees,” says Kasper. “The ideal temperature is around 33 degrees.”
Clams are perishable but will last 2 days if kept cold. If you’re clamming yourself and you’re not ready to use them keep them in the ice cooler under the ice with the lid closed and out of the sun. Pack the ice around the cooler and keep the temperature around the clams at 40 degrees. Keep the clams from opening their shells. They need to stay closed for a short time stored. If they open up tap them with a knife or spoon and they will close up. If the clam doesn’t shut the shell then properly dead. throw it out.
Clams that are subjected to high temperatures won’t last very long. If you clamming get them right in the cooler on ice. At home take the clams that you caught or bought and remove the clams from the bag or cooler to let them breathe. Keep them alive by placing them in a colander. Place the colander on top of a bowl to let the water drain from the clams.
Soak paper towels in the water. Remove the excess water from the paper towels until they do not drip. Drape the paper towels over the colander. Refrigeration at this temperature won’t kill bacteria but will slow the growth of bacteria a number of times until they’re ready to cook.
How to Soak Clams to Get Rid of Sand
Scrub the clam. Most shellfish that are commercially farmed, should be pretty clean. However, if you caught them yourself you’ll want to give the outsides of the shells a good scrubbing to dislodge any remaining grit. Remove any beards by pinching and pulling to get rid of them. Clams with darker shells are the result of growing in silt or mudflats. Lighter shells indicate that the clams grew in the sand; they’ll be harder to clean.
Most experts recommend soaking the clams in salted water in the refrigerator from an hour to overnight but as always there is a difference of opinion on everything. Different clams need different methods and times of purging times. It depends on how and where they live. Hardshell clams in clean sand, like Eastern surf clams, cockles, and quahogs, tend to be easier to purge than open-shelled clams like steamers, horse neck clams, and littlenecks. The worst of them all is the Western bent-nosed clam, which lives in dense mud and can take days to purge. The cleaner they are the better they taste without losing the natural juices.
Some people believe that saltwater is all you need and that Cornmeal is a waste of time. Others use black pepper with seawater that the clams came from. So before leaving the Clam bed through a few gallons in the cooler. But saltwater or seawater is always involved. Freshwater will KILL Clams so make sure you are soaking them in salt.
You can make your own saltwater soak the clams in salt water, and mix 1/3-cup salt (100 grams) with 1 gallon (3.8 liters) of water. Soak the clams for 30 minutes. Take the clams out by hand. Make another bowl of the saltwater mixture and soak the clams again. This process should be repeated 1-2 more times. The more the better. Clams don’t use sand for digestion so the sand content is because of the environment which to me, is better than being buried in mud.
My favorite clams are Littlenecks that I’ll soak overnight and it works out perfect for the next day’s picnic. They need to soak a little longer than the bigger ones do. There is an old belief in New Jersey, that you should only eat clams and oysters in months that don’t contain the letter r. That would be May through August. There is a logical reason behind this.
There are two main factors behind that rule:
- Warmer waters bring Red Tides and Algae blooms- they are the months that clams absorb toxins in the water and cause paralytic shellfish poisoning (PSP).
- It’s also when oysters and other shellfish spawn—a fertile oyster isn’t a tasty one. Most farm-raised clams are closely monitored.
My favorite way is to:
Clean the outside first, then place a wire rack or sieve inside the large tray or bowl and put the clams in a single layer. The reason why you put the rack or sieve inside the tray or bowl is that any sand and grit the clams purge would stay on the bottom of the tray or bowl instead of being consumed by the clams again.
As the clams breathe they filter water. When the fresh water is filtered, the clam pushes salt water and sand out of their shells. After a while, the clams will have been cleaned. Rinse whether done or not. That’s up to you their natural juices are inside the clamshell.
- Once you’ve cleaned them cook and eat them.
- When you rinse them in cold water, they should close. If they don’t close, it means they are dead and must be disposed of.
- When you cook them, they will open up again. If they are not open when cooked, throw them away
- Don’t try to open them, it means they are not edible.
JimGalloway Author/Editor
![]()
reference:
Your Guide to Cleaning and Storing Clams, Mussels & Other Mollusk