A Zamboni is what’s called an Ice Resurfacer used at Ice Skating Arenas between periods of a Hockey game and before and after Ice Skating Exhibitions there are plenty of Ice Resurfacrers (Resurfacing machine) but none like the Zamboni. What does a Zamboni do?
Zamboni Ice Resurfacer invented in 1949 made the job of resurfacing Ice rinks from a 5-man, 90-min. task to a 1 man, 15-min. job by:
Shaving the Ice-cuts 1/16″ off the top layer
Washing the Ice-cleans ice surface.
Layering new Water-deposits clean H2O ice.
Spreading new Water evenly on the surface
Before you check out the article take a look at the video from a cartoon that was created when we were kids and memorized by the sight of the big tractor that cleaned the ice surface called the Zamboni According to Charlie Brown “There are 3 things in life that people like to stare at a Flowing Stream, A Crackling Fire and a Zamboni clearing the ice”
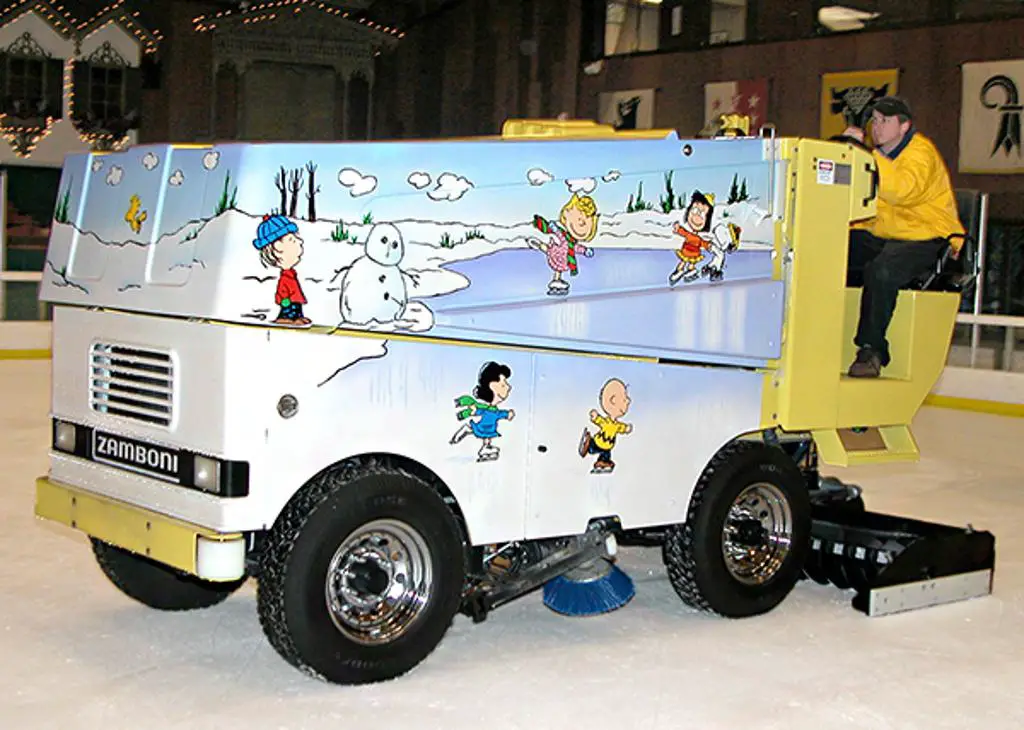
Zamboni Ice Resurfacer
 Most people’s introduction to a Zamboni Ice Resurfacer is at a Professional Hockey game when that strange-looking machine comes out on the ice and makes the ice rink look smooth-like glass. The Zamboni is what’s called mechanical ice resurfaced.
Once the ice is made, at the start of the season, the ongoing task of maintaining the quality of the ice becomes the primary focus of the operator of the Zamboni. One of the essential tools for helping maintain the ice is the Zamboni. This mechanical marvel was first built in the early 1940s in southern California. Frank Zamboni and his brother Lawrence needed a more efficient way to resurface their large ice rink.
Zamboni is not the official name for ice resurfacing machines, but the term has become ubiquitous as an homage to the man who shaped the modern standard for ice rink conditions. Frank J. Zamboni, Jr. received a patent to produce his ice resurfacers in 1953 after years of working as a block ice salesman.
Born in 1901, Zamboni spent his childhood on his family’s farm in Idaho, tinkering with mechanical equipment before moving in 1920, to Los Angeles to help his older brother run an auto garage. Soon, he saw an opportunity in a different space: refrigeration.
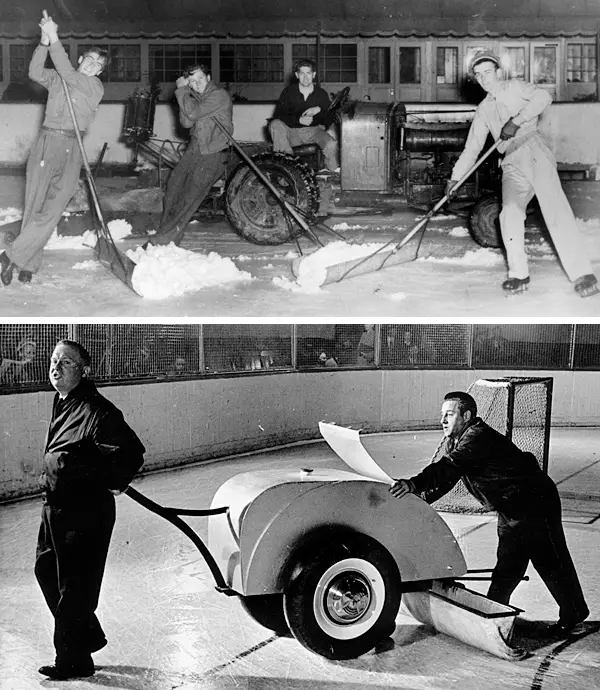
1940, teamed up with his cousin and brother to open his own ice skating rink down the street from his ice plant. Iceland Skating Rink was unlike anything Southern Californians had seen: The 20k sq. ft. facility — one of the largest in America — could house 800 skaters at once. The business was a smash hit, attracting 150k skaters per year. At the end of the day, Ice Skaters chewed up the ice so bad that he, his brother, and a few friends used;
- A tractor would roll across the ice with a scraper in tow.
- Workers would manually shovel up the shavings and “squeegee the dirty water away.”
- The workers would spray on new layers of water.
This process took 4 men up to 1.5 hours to complete. Soon their resulting invention the Zamboni Ice Resurfacer could perform all of these tasks in 15 minutes while driving across the ice. They kept at it coming up with another machine until they finally came up with something that worked.
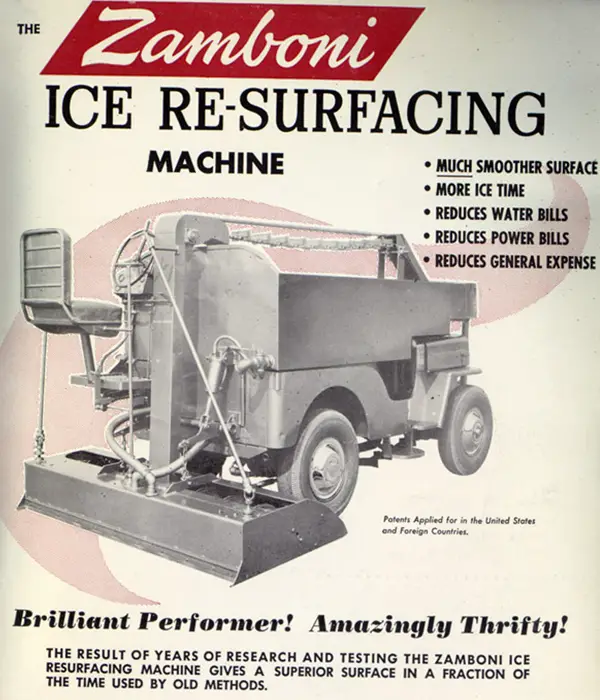
Then, in 1949, he invented the machine that transformed the job of resurfacing an ice rink from a five-man, 90-minute task to a one-man, 15-minute job.
The initial machine included a hydraulic cylinder from an A-20 attack plane, a chassis from an oil derrick, a Jeep engine, a wooden bin to catch the shavings, and a series of pulleys. His son, Richard, said, “It took him nine years. One of the reasons he stuck with it was that everyone told him he was crazy.” Zamboni did not expect to make more but, after seeing the machine, Sonja Henie immediately ordered two, and then the Chicago Blackhawks placed an order. Zamboni applied for a patent in 1949
How Does The Zamboni Work
What a Zamboni Actually Does
 The essential functions of a Zamboni can be divided into four steps:
- Shaving the Ice: A Zamboni cuts away the top layer of ice (often 1/16th of an inch or less) using a sharp blade, much like a shaving razor. Rotating augers carry away the shavings into the ‘snow tank,’ which lies toward the front of the machine.
- Washing the Ice: Underneath the snow tank lies the water tank. Water stored here is fed into a device called the ‘conditioner’ that flushes dirt and debris and the occasional bloodstain or broken tooth) from the playing surface. A vacuum hose pulls and deposits this dirty water into a separate storage tank to be filtered for future use.
- Layering New Water: A mop deposits clean water onto the ice. The water itself is kept hot—140° Fahrenheit (60° Celsius) is the usual mark—to slightly melt the remaining top layer of ice. This helps to even out any leftover skate grooves the shaving blade couldn’t reach.
- Spreading the New Water: Gaskets at the back of the machine ensure the water spreads evenly across the ice; refrigerant systems under the ice ensure it freezes and stays frozen.
Resurfacing the ice with a Zamboni helps maintain a pristine skating surface for the players. We’ve all had a day when the ice could have used some TLC; ice resurfacers help alleviate chattering, skipping, and a ‘gritty’ feeling on the ice, at least for a time.
How Thick is Hockey Ice
How thick is NHL ice?
Most Ice Skating Rinks have thin Ice is approximately 3/4″ of an inch thick and is usually chilled at 16 degrees Fahrenheit. The thicker the ice, the softer and slower it becomes.
How are the markings applied to the ice?
The markings (lines, circles, creases, etc.) are painted onto a half-inch thick sheet of ice, which is sprayed onto a concrete floor that has frozen pipes embedded. An additional coating is applied to secure the markings and build the ice up to the prescribed thickness.
Hockey Rink Ice is made as thin as possible. Water will be laid down until the surface is basically level. Then any markings necessary will be painted or laid on the ice and frozen in. Now enough ice will be laid on top that surfacing equipment, usually a Zamboni-type machine, can run without cutting into the lines. This is usually between 1 and 3 inches total, depending on how flat the floor is. The less ice you can get by with, the less it will cost to keep it frozen.
How to Make an Ice Rink
If you are thinking to buy or rent one of these guys with an Operator think about this. Newer Zamboni models can cost upwards of $200,000 the investment is not a small matter. Not all of us can afford to rent or own a Zamboni to maintain our Community Centers, Township Parks, or our backyard Ice Rinks we use for Ice Skating or Hockey games. There are a few tips that we can give you for keeping your Rink up to par. Here are a few tips for starting or performing maintenance on your Skate or Hockey Rink
Prepping the Rink
- Dress for the weather
- wear cleats if you can find them
- Before you start the Flooding process-you need to clean any trash, rocks, sticks, or boards that will stick up through the ice
- Check the rink and make sure there are no screws or hazards sticking out of the wall
- Fill in any gaps between the base of the walls and the base of the rink
- Inspect any Rinks built from asphalt or concrete for cracks and heaving
- Cracks should be filled with sand or snow before flooding the Rink
- If possible try and fill a 2″ layer of snow before flooding
- Ice on Asphalt can melt because of Asphalt’s dark color
Flooding the Rink
- From the furthest point of the water supply use a fanning action and get the 1st frozen level down
- Start the 2nd after the first level is frozen
- Once the ground is sealed then heavier flow can begin
- As a general rule flood at outside temperatures between -5 to -20 C
Ice Rink Resurfacing
- Do light resurfacing floods throughout the season
- Resurfacing floods should be as thin as possible
- Always remove any snow bumps or edges before flooding
- You might need to use a heavy scraper to get the ice clean
- Also, use a stiff straw broom
- If it’s very windy Do not Flood!-the water from the hose will freeze and not bond to the level of ice on the Rink and will chip off!
- Do not use hot water when it’s colder than -15 C
Common Problems are Chips, Cracks, and Air Pockets under the ice to fix these Problems:
- Clean the Crack or Air Pocket with a Broom
- Pack the Crack with a Trowel with snow and some water mixed in with it
- Wait for it to freeze
- Keep repeating until the cracks or hole is flat
- Push the ice down deep into the opening and then level the top with a snow
When resurfacing, even with cold water, to the ice ANY water you put on the ice, is warmer than the ice itself, Even cold tap water comes out 55F/13C. Combine that with the best resurfacing happening at 25F/-4C and you get a 30/17 degree temperature differential. So just like pouring, even cold water over a glass full of ice. It will pop and crack while filling up.
When it gets extremely cold, say 5F/-15C your ice freezes “solid” and the winter air dries out and pulls the moisture out of everything, including your ice. That water “was” the glue that was holding the ice together. Once the winter air dries out your ice, and the moisture has been depleted you will get 1-2-3-4 cracks the entire length of your rink. We call them Spider Cracks.
You can do two things to get them repaired and help prevent further cracks:
Just like you may have seen on TV or at the local rink when a hole is created in the ice, the ref or players will scrape some ice shavings, pack them in the hole, wet it, and then smooth it over with a puck. The same goes for your backyard rink. Grab some snow (assuming you have some), pack it in the holes and cracks, wet lightly and smooth over the best you can with a puck, or even a concrete trowel, and let it freeze.
Before you get any cracks, or when you fix any holes or cracks you have in the ice, and it’s cold enough and going to stay cold enough to keep your ice frozen, you should put many “thin” layers of water/ice on the rink, letting each layer freeze before adding another layer. This will give you a harder layered ice surface on the top and be less prone to cutting, chipping, and cracking as long as that “layered” ice stays frozen.
To keep your Ice Rink as smooth as possible Inspect the rink for any big gouges or divots. Fill these in with a mixture of snow and water, commonly referred to as slush. Use a Snow shovel to smooth the slush out, similar to mudding a drywall seam or using wood putty on a joint.
JimGalloway Author/Editor

References: Pure Hockey –How Does a Zamboni Work?
NiceRink–Ice Rink Maintenance Tips
