If you own a swimming pool then you should already know the importance of testing your pool at regular intervals but just as important is the art of taking the sample that is to be tested. How to Take a Sample of My Pool Water
To take a sample:
- Rinse out a clean plastic bottle that will hold 8 to 12 ounces of the H2O to be tested
- Rinse the cap off
- Immerse the container bottom-side up into the H2O
- Lower about 18″
- Turn the bottle right-side up to fill
- When full, bring it to the surface
- Cap immediately to keep air out
- Run tests
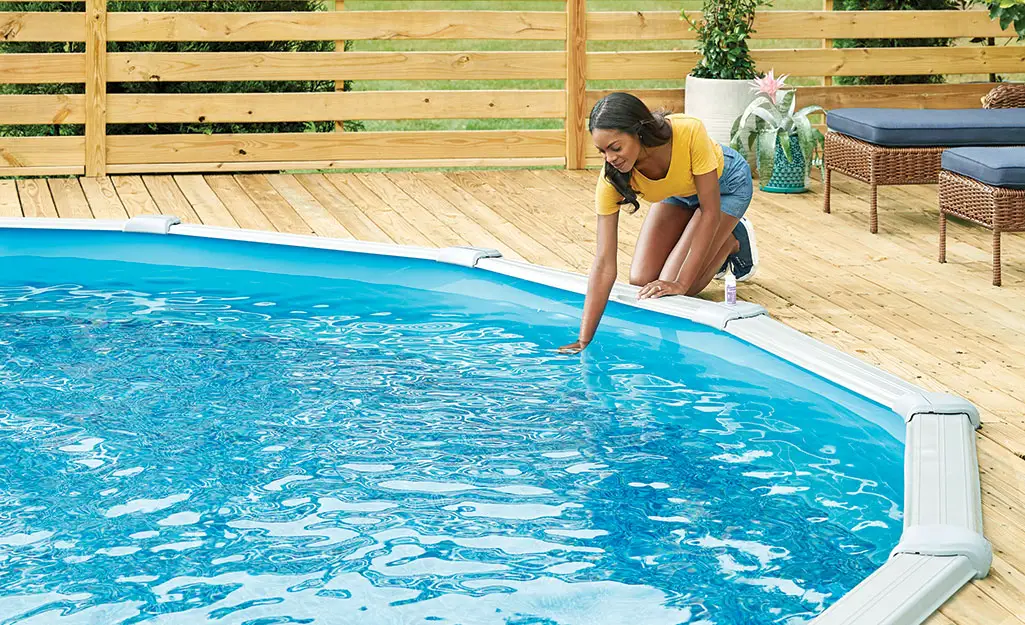
First, find a location away from return lines. If the pool has a shallow and a deep end, take the sample near the point where the bottom of the pool starts to slope toward the deep end. If the water is of uniform depth, positioning is not as important as long as you are not near any return lines or dead zones like a corner or steps. If testing a spa, make sure the jets and blowers are turned off.
Introduction:
Sampling and Testing pool water is crucial for maintaining a safe and healthy swimming environment. It ensures that chemical levels are balanced, preventing the growth of harmful bacteria and algae. Regular testing also helps protect pool equipment from damage caused by imbalanced water chemistry. Additionally, it ensures compliance with safety regulations and standards, promoting public health and safety. Ultimately, testing pool water regularly is essential for providing a clean, clear, and enjoyable swimming experience for all users.
How to Take a Sample of My Pool Water
Find a location away from return lines. If the pool has a shallow and a deep end, take the sample near the point where the bottom of the pool starts to slope toward the deep end. If the water is of uniform depth, positioning is not as important as long as you are not near any return lines or dead zones like a corner or steps. If testing a spa, make sure the jets and blowers are turned off.
To take a sample of water sufficient for all tests being performed, rinse out a clean plastic bottle that will hold 8 to 12 ounces of the water to be tested. Rinse the cap off too. Then, immerse the container bottom-side up into the water to about elbow depth (about 18″). Use a plastic container since glass could accidentally break.
Turn the bottle container right-side up to fill. When full, bring it to the surface. Cap immediately to keep air out. If you head indoors to do the tests, be aware you will need an inexpensive daylight simulator, to perform color-matching tests in the right light. Artificial light is not as great a consideration for titrations where you are looking to see the moment the treated solution changes color, as opposed to detecting a shade of color.
The sampling process for pool water involves several key steps to ensure accurate results:
- Preparation: Gather clean containers and any necessary testing equipment, such as test strips or a digital tester.
Samplers for Swimming Pools - Sampling Location: Choose a representative area of the pool away from skimmers or return jets to collect the water sample.
- Collection: Submerge a clean container elbow-deep into the pool water and turn it upside down to collect the sample.
- Sealing: Cap the container tightly to prevent contamination and label it with the date and time of collection.
- Transport: Store and transport the sample to the testing location promptly, avoiding exposure to sunlight and extreme temperatures.
- Testing: Use the sample to conduct pool water tests for parameters such as pH, chlorine, alkalinity, and more, following the instructions provided with your testing equipment.
By following these steps, you can effectively sample your pool water and obtain accurate test results for maintaining proper water chemistry.
To gather supplies for sampling pool water, you’ll need:
- Clean plastic container
- Gloves (optional)
- Testing equipment (e.g., test strips, digital tester)
- Marker or label for labeling the container
- Any additional accessories specified by your testing method (e.g., dropper for liquid reagents)
Having these supplies ready ensures a smooth and accurate sampling process for testing your pool water.
Select Sampling Location
When selecting a sampling location for pool water, consider these factors:
- Depth: Sample water from elbow depth to ensure it’s representative of the pool’s overall chemistry.
- Away from Obstructions: Avoid sampling near skimmers, return jets, or other water features to prevent contamination.
- Even Distribution: Choose an area where the water is well-mixed to ensure an accurate representation of the pool’s chemistry.
- Accessibility: Select a location that’s easy to access for sampling and doesn’t require reaching over obstacles.
- Consistency: Test from the same location each time to monitor changes in water chemistry accurately.
By considering these factors, you can select a suitable sampling location for testing your pool water.
Choosing a representative area for sampling pool water is crucial as it ensures accurate test results that reflect the overall water quality. Avoiding areas near skimmers or jets is important because these locations may have different chemical concentrations due to water circulation and surface debris accumulation. By selecting a representative area away from such influences, you can obtain a more accurate assessment of the pool’s water chemistry, leading to better-informed maintenance decisions and a safer swimming environment.
Collecting Sample of Pool Water
Collecting a water sample from your pool is essential for accurate testing. Here’s how to do it:
Step-by-step instructions:
- Use a clean plastic container.
- Submerge the container elbow-deep into the pool water.
- Turn it upside down to collect the sample.
- Cap the container to prevent contamination.
- Label it with the date and time of collection.
Tips for ensuring accuracy and cleanliness:
- Rinse the container with pool water before collecting the sample to remove any residue.
- Avoid touching the inside of the container or the water with your hands to prevent contamination.
- Rinse your hands with clean water before handling the container to avoid transferring oils or dirt.
- Collect the sample from multiple locations in the pool to ensure it’s representative of the overall water quality.
- Test the sample promptly after collection to prevent changes in water chemistry.
By following these steps and tips, you can collect a clean and accurate water sample for testing your pool’s chemistry.
Store and Transport the Sample

In conclusion, proper sampling of pool water is paramount for maintaining a safe and healthy swimming environment. By collecting representative samples away from skimmers or jets and following strict guidelines for storage and transportation, accurate test results can be obtained. Regular testing of pool water is not only essential for ensuring chemical balance and preventing waterborne illnesses but also for protecting pool equipment and complying with safety regulations. I encourage all pool owners to prioritize regular water testing as part of their maintenance routine to ensure a clean, clear, and enjoyable swimming experience for all.
![]()
References:
Taylor- How to Take a Pool Water Sample
FAQ’s
- Are there any safety precautions I should take when testing pool water?
When testing pool water, it’s important to wear gloves to protect your skin from chemical exposure, especially if handling liquid reagents. Additionally, ensure proper ventilation in the testing area to avoid inhaling fumes from chemical reactions.
- What equipment do I need for testing pool water?