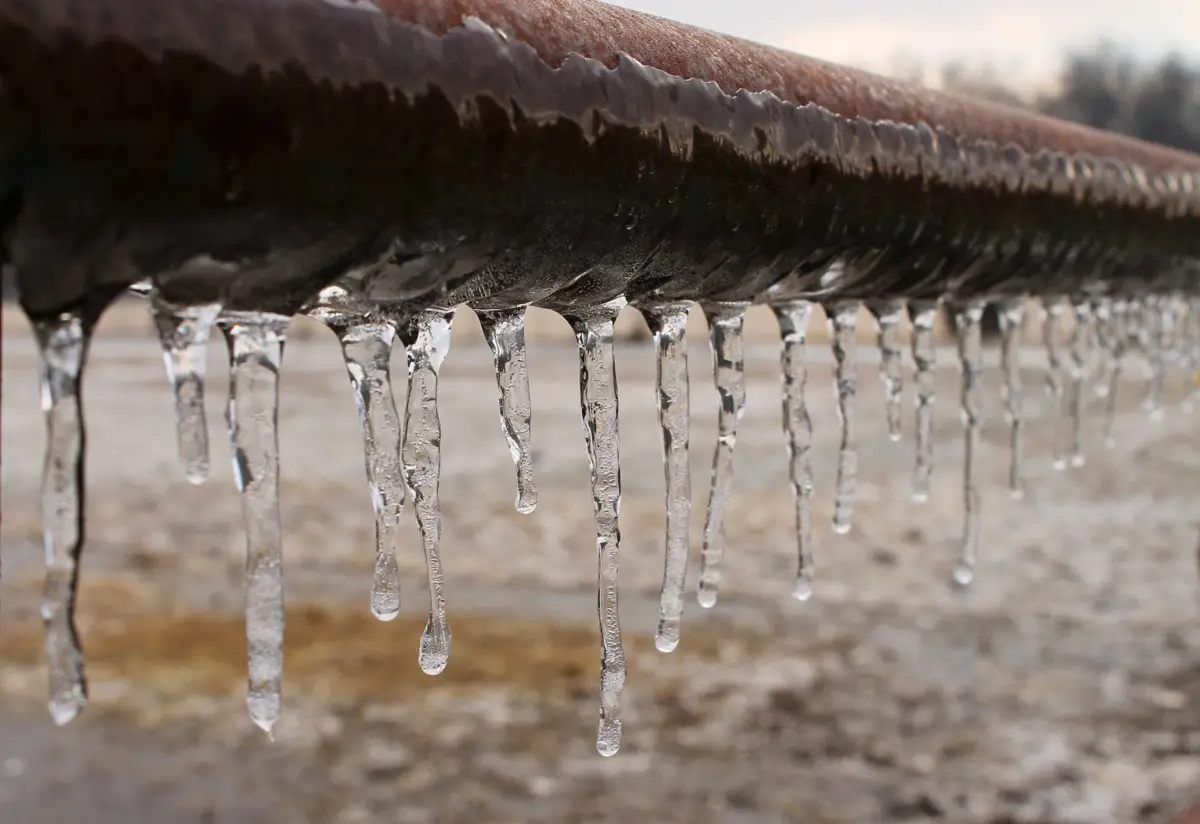
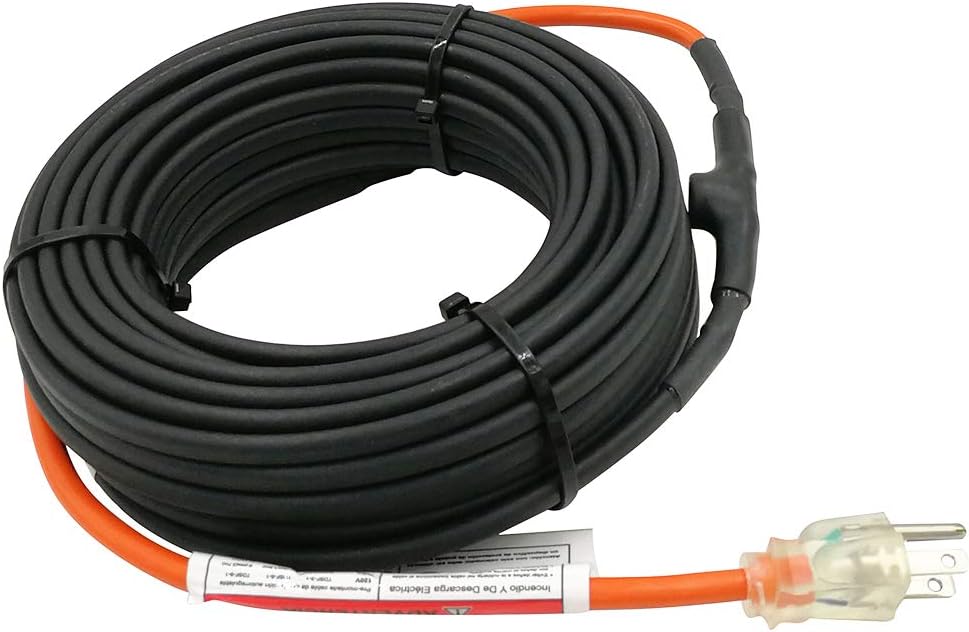
When your water is off for any length of time, it becomes a minor inconvenience, but if your water pipe freezes and the water turns to ice, it can burst any type of water pipe, causing large amounts of damage to your property. Heat Tape is the answer for many people who have been exposed outside water Pipelines that supply water. What is the proper way to use Heat Tape?
- Surface Prep: Ensure it’s clean and dry.
- Placement: Wrap tape evenly around pipes.
- Secure: Use insulation or tape for stability.
- Power Connection: Follow manufacturer’s instructions precisely.
- Thermostat Setting: Adjust for desired temperature (if applicable).
- Monitor Regularly: Check for any abnormalities or issues.
- Follow Guidelines: Adhere to specific product instructions.
- Regular Maintenance: Ensure consistent performance by periodic checks.
Even though we have been taught for many years that water and electricity don’t mix well, sometimes they do, and Heat Tape used properly can keep your property’s water supply running and roof gutters’ downspouts free of ice through the worst of cold weather.
Introduction:
Welcome to the sizzling realm of cold-season ingenuity, where the icy clutch of winter meets its match in the form of heat tape! Discover the transformative process of embracing your water hoses with the warming embrace of heat tape and heat cable, ensuring fluidity in the harshest of frosts. This guide will illuminate the coiled path of installation, promising to keep your water flowing despite the chilly whispers of old man winter. Embark on this thermal odyssey and bid adieu to frozen pipes and water woes!
How to Use Heat Tape: Install Heat Tape & Heat Cable for Water Hoses
When winter’s chill brings a threat of frozen pipes, knowing how to use heat tape can be a true household savior. The secret to maintaining a liquid lifeline for your home lies in the proper installation of heat tape and heat cables for your water hoses. Dive into this essential guide to learn how to install these tools, making sure that your home stays well-hydrated and happy, regardless of how low the temperature may drop. Let’s unravel the mysteries of heat tape, your trusted ally in the fight against the freeze.
Firstly, let’s tackle the basics. A water hose, through which the essence of life flows, can succumb to the icy grip of cold temperatures. By using heat tape, a form of electrical heating element, you can protect these vulnerable pipes. It’s a game of consistency, so you’ll want to install the heat tape evenly along the water hose, ensuring that this lifeline won’t crack under pressure. Heat tape installation is a straightforward process, but you must be methodical—wrapping the tape without overlapping, securing it with the right materials, and plugging it into a reliable power source.
The heart of your heat tape system comes with a thermostat, a smart device that responds to temperature changes and adjusts the heat accordingly. It’s not just about cranking up the temperature; it’s about maintaining an equilibrium. As you install, the thermostat must be in contact with the pipe, as this is where it senses the temperature most accurately. If you’re not versed in how to use a thermostat, simply read the manufacturer’s instructions; they’re your home’s guardian angels.
Now, we can’t emphasize enough the importance of safety during installation. As you navigate the process in your home, be sure to turn off the power supply. You’re working with electricity and water, a risky team, so caution can’t be overstated. Once you’ve securely attached the heat tape to the pipe, insulate it. This isn’t a job for regular tape—use specifically designed insulation that can withstand the heat. When you’re ready to awaken the beast, restore the power and let the heat tape do its magic, keeping your water hose and your home’s stability in check.
After you’ve wrapped the electric tape around the pipe, seal the deal. With every step, every wrap of tape, and every flick of the thermostat switch, you’re ensuring that your home isn’t disrupted by frozen pipes. So there you have it, an elaborate tapestry of steps on how to use heat tape, to brighten your home through the chilliest of times. You’ll ensure a well-protected, fully functional water hose, pipe, and a house that’s equipped to face even the mightiest of temperatures.
Step-by-Step Instructions to Install Heat Tape for Temperature Control
First, you’ll want to gather all your tools and read through the instructions. To install heat tape successfully, having a clear plan is key. Ensure you’ve got all your heat tape, a thermostat if necessary, and installation essentials on hand. Take a moment to familiarize yourself with the heat tape’s workings – it’s easier to use a tool when you know its purpose inside and out.
Now, let’s prepare the water hoses. They need to be dry and clean for the heat tape to adhere properly. The installation starts by measuring how much heat tape you’ll need. It’s like measuring twice and cutting once – but in this case, it’s applied once and prevents frost forever! Next, start at the end of the hose farthest from the spigot, wrapping the heat tape snuggly without overlapping. It isn’t a race – take your time and use these step-by-step instructions.
With everything secure, you are ready to plug in the heat tape. But don’t just jam it into the socket – we’re aiming for precision. Make sure there’s no tension in the water hoses or heat tape; it should be a relaxed fit. Flip the switch, and if the thermostat is installed, monitor the temperature to ensure it’s functioning correctly. Adjust it to the desired temperature level for optimal use.
Maintenance is also part of how to use heat tape the right way. Inspect it regularly, especially if the temperatures dip lower than usual. It’s all about monitoring and ensuring everything is cozy. Moreover, when you’re installing, always follow safety codes. They’re more than suggestions, they’re guardians of your well-being.
Remember, the key to extending the lifespan of your water hoses during colder months is the proper use of heat tape. By following these instructions meticulously, you’ll safeguard against the damage caused by dropping temperatures. Don’t skimp on quality, either – choose the best heat tape you can, as it’ll serve you faithfully through the frostiest seasons.
While 527 words might seem like a textbook’s worth of information, it’s your go-to guide, ensuring that your heat tape installation is as smooth as sailing in the Caribbean. And whenever you’re in doubt, reread these instructions. Precision in applying heat tape isn’t just about preventing the freeze; it’s about peace of mind, knowing you’ve taken the right steps to protect your home.
Heat Cable vs. Heat Tape: Understanding the Types and Uses
Heat cable and heat tape are terms often used interchangeably, but they refer to distinct products. Heat cable is flexible and suitable for wrapping around pipes, providing freeze protection. Heat tape, on the other hand, may include a variety of products, such as self-regulating or constant wattage tapes, offering versatility for different heating needs, from preventing ice dams to maintaining consistent temperatures in pipes. Understanding the specific application and characteristics of each is crucial for effective temperature control.
No matter where you call home, the wrath of winter can wreak havoc on your water hoses. But fret not—using heat tape or heat cable can be a game-changer. Now, you may be asking, “What’s the difference between heat tape and heat cable?” Well, step into the arena of warmth where you’ll get acquainted with the types, uses, and characteristics to keep those pipes toasty.
 First off, heat tape is a type of heating element that’s often flat and ribbon-like. It’s tailor-made to apply direct heat to pipes and hoses, ensuring ice won’t put a freeze on your day. Heat tape’s simplicity makes it a popular choice in many a home, as it caters to varying length and temperature needs. Whether it’s a short spurt of pipe or a long meander that needs heat, there’s heat tape cut for the task.
On the flip side, heat cable is typically round and can be more flexible. This type flaunts the ability to wiggle comfortably around corners and curves, providing a versatile solution for intricate piping systems. It’s not just about flexibility; heat cable brings its A-game when it comes to consistent temperature control, keeping the chill at bay over lengths that bend and wind.
When using these tools, always follow the manufacturer’s guidance. They’ve dialed in the perfect temperature settings and installation methods to ensure efficacy and safety. Remember, too much heat can be just as bad as too little, so sticking to the suggested temperature is paramount. “But what about length?” Each manufacturer will recommend a maximum length for optimal heat distribution—heed these recommendations, lest you fall into a lukewarm predicament.
Uses of heat tape and heat cable span from the simple to the complex. Aside from preventing your water hoses from turning into ice sculptures, they’re employed in maintaining that just-right temperature for home comforts. Whether you’re looking to sidestep a burst pipe disaster or just want your water supply to flow freely, there’s a heat solution that’s just the ticket.
The key to heating success, however, lies in proper installation. Using heat tape or heat cable requires a thoughtful approach—overlaying or improperly spacing the tape can lead to overheating, while too sparse an application may leave cold spots. It’s the Goldilocks principle of home maintenance—everything needs to be just right.
- Gauge your length requirements
- plot the temperature thresholds and you’ll be on track for a warm and worry-free winter.
In conclusion, whether you choose heat tape or heat cable, you’re investing in peace of mind for your home. Both types provide heat where it’s most needed, and both can be a cinch to use with a careful reading of the manufacturer’s instructions. So measure up, plan out, and be ready when the mercury dips—your trusty heat tape or cable will have you covered like a champion against the cold. With the proper type, length, and temperature settings in place, precipitous temperatures won’t stand a chance against your well-defended domicile.
How to Install Heat Cable for Some Specific Applications
Whether we’re talking about ensuring your water hose remains unfrozen or keeping your pipes snug and ice-free, understanding the type of heat tape and cable to use is essential. We’ll navigate through the specifics, ranging from the right temperature settings to the ideal length of heat cable needed for your unique situation.
When you’ve chosen a heat cable designed for the correct use, which in this case is for water hoses, the next step is to adopt the ideal way to install it to maximize efficiency and safety. Wrap the cable along the length of the water hose, being careful not to overlap, as this could lead to overheating. This method also applies when securing heat cables to pipes, ensuring that the warmth is distributed evenly. The instructions on how to install the product should be your compass, pointing to the optimal installation course for various types of pipes within your home. Here are some scenarios:
Now, the specifics of installation must be tackled with a focus on the individual types of uses. In some scenarios, installing heat cables along the length of short pipes could be a straightforward Sunday afternoon project. However, when dealing with longer pipes or those in hard-to-reach areas of your home, considering the help of a professional might be smart. Regardless of the type of heat cable or the pipe, it’s being attached to, you must prioritize your home’s safety by adhering to the use requirements that the manufacturer specifies.
So what’s the significance of length when figuring out how to install heat cables? The answer is rather simple – it’s everything. A heating cable too short won’t offer the necessary coverage and heat distribution. On the flip side, an oversized cable could be wasteful and cumbersome. Assessing the specific length needs in advance can make the installation process smoother and more effective, ensuring your home is protected in just the right way.
Installation doesn’t have to feel overwhelming, especially when you’re armed with the know-how of the types of cables and various uses. Remember, installing heat tape in your home can be more than just maintaining temperature control; it can be an act of preserving the integrity and longevity of your water hoses and pipes.
By paying heed to these details and selecting the right type for your specific needs, you’re on your way to seamlessly integrate this essential home maintenance tool into your arsenal. So, let’s turn the heat up on installing heat cables – the right way, for the right type, and with the right approach for each specific use around your home.
Heat tape meets all safety requirements that are set by UL (Underwriters Laboratories) standards but has a history of danger in some applications. According to the Consumer Product Safety Commission (CPSC), heat tapes cause approximately 2,000 fires, 10 deaths, and 100 injuries every year. Some figures for deaths and injuries are higher and include estimates of property damage exceeding $25 million a year. A regular inspection of any electrical device that is exposed to the weather is the best approach. Always be Careful!
Conclusion:
Remember, when winter’s icy grasp tightens, a proper installation of heat tape or heat cable can be your water hose’s best protector. Follow the steps diligently, respect electrical safety, and do not hesitate to consult a professional if uncertainty lingers. A conscientious setup will ward off the frost, ensuring that your water flow remains steady and unfrozen through the chilliest seasons. With your newfound knowledge and a watchful eye on maintenance, you’re now well-equipped to keep your hoses in full, liquid-fueled vigor, no matter how low the mercury dips.
![]()
References:
OnTopRoofing– Self Regulating vs Constant Wattage Heat Tape
UL Research Institutes-UL Research Institutes
FAQ’s
Q: What is the purpose of a thermostat in a heat tape system?
A: The thermostat controls the temperature of the heat tape, turning the heat on or off in response to pipe temperatures. It helps maintain an equilibrium, preventing the pipes from getting too hot or staying too cold, and conserves energy by heating only when necessary.
Q: How do I ensure safety when installing heat tape?
A: Safety is paramount when installing heat tape due to the use of electricity near water. Turn off the power supply before beginning, carefully follow installation guidelines, and use the correct insulation materials. Once installed, carefully restore power and monitor the system to ensure it’s working correctly.
Q: How do I choose between heat tape and heat cable for my pipes?
A: Consider the flexibility and heating needs of your pipes. Heat tape is typically flat and suits straight runs of pipe with varying temperature needs, while heat cable is round, more flexible, and better for intricate piping systems. Check the product specifications and physical layout of your plumbing to decide which option is best for your circumstances.